- Offer
- Offer
- System types
- System KAN-therm ultraLINE
- System KAN-therm Push
- System KAN-therm ultraPRESS
- System KAN-therm PP
- System KAN-therm PP Green
- System KAN-therm Steel
- System KAN-therm Inox
- System KAN-therm Steel Sprinkler
- System KAN-therm Inox Sprinkler
- System KAN-therm Groove
- System KAN-therm Copper
- System KAN-therm Tacker
- System KAN-therm Profil
- System KAN-therm Rail
- System KAN-therm TBS
- System KAN-therm WALL - the wet method
- System KAN-therm WALL - the dry method
- System KAN-therm Football
- KAN-therm InoxFlow
- KAN-therm Cabinets Slim & Slim+
- Installation types
- Heating and cooling installations
- Cold and hot tap water systems
- Underfloor heating and cooling systems
- Wall heating and cooling systems
- External surfaces heating and cooling systems
- Firefighting sprinkler system
- Technological and industrial systems
- Form-inquiry
- KAN-therm water supply distribution systems
- Examples of KAN-System mixer tap fixture branches
- Calculators
- KAN-therm SMART & BASIC+ Automation Systems
- New products in offer
- KAN-term with a new QB certificate.
- Download
- Guarantee of quality
- Reference objects
- About us
- Contact


Connecting technology
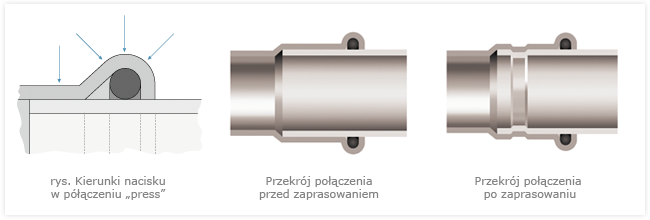
The KAN-therm Inox and Inox system bases on a press-on „ultraPRESS” system of joining utilising an „M” clamp profile, thus we receive:
- 3-plane pressing o the O-ring, ensuring its proper deformation and adherence to the pipe surface,
- full closure of the groove, where the O-ring sits, by pressing the fitting edge to the tube surface thus preventing intrusion of impurities into a fitting and ensuring mechanical protection of the seal and mechanical strengthening of the connection,
- check of the sealing condition resulting from the shape of the O-ring groove, next to the fitting edge.
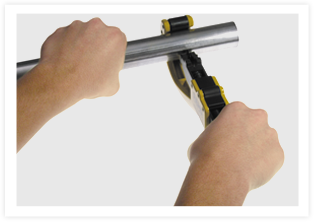
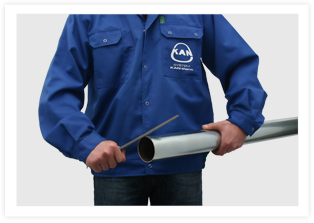
1. Pipes shall be cut perpendicular to the pipe axis with a disc cutter. Other tools like hand and electric saw designed to cut stainless steel are allowed, provided perpendicular cutting is maintained and no damage to edges being cut are prevented. Breaking off a partially cut pipe section is not allowed. Do not use for cutting burners and cutting disks. While measuring lengths to be cut off, take into account the length of a pipe to be inserted into a pipe fitting.
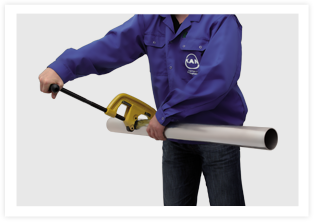
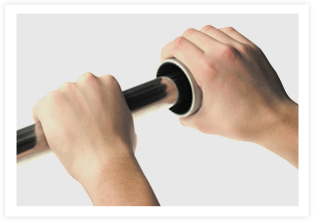
2. When using a hand or electric chamfering tool (for larger sizes a half-round file for steel) chamfer the outside and internal edge of a cut pipe and remove any burrs, which can damage the O-ring during assembly. Remove also all filings on the outside and inside a pipe, which can increase the risk of point corrosion.
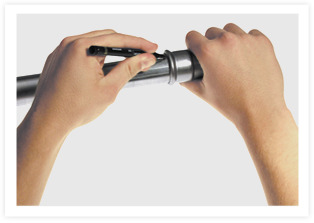
3. To achieve a right strength of a connection a pipe must be inserted to a right depth into a fitting. Mark this required depth on a pipe (or on a fitting with a bare end) with a marker. After pressing, that mark must be visible just next to the fitting edge.
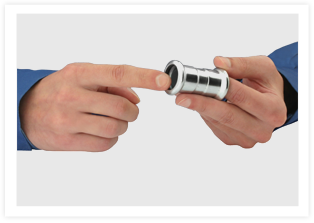
4. Prior to assembly check visually the presence and condition of the O-ring. Check, if there are no filings or other dirt on a pipe and in a fitting, which can damage the seal during inserting it into a pipe. Make sure if the distance between the neighbouring fittings is not below a permitted one.
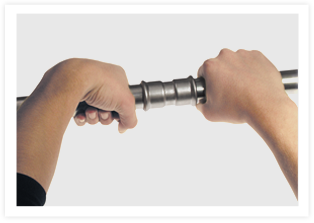
5. Prior to clamping insert a pipe axially into a fitting to the marked depth (during this step you may rotate the pipe slightly). Do not use oil, grease or fat to facilitate insertion of a pipe (water or soap solution are recommended for compressed air pressure tests). In case of a simultaneous assembly of a number of connections (by inserting a pipe into a fitting) prior to clamping every successive connection check on a pipe the marked depth of insertion.
6. Before you start the process of clamping check the tools. We recommend using a clamper and pressing jaws delivered by KAN-therm System. Always select the size of clamping jaws appropriate to the diameter of a connection you are making. Fit the clamping jaws on the union so that its internal profile embraces precisely the groove, where the O-ring sits in a fitting (convex part of this fitting). Having started the clamping tool the clamping process is automatic and cannot be stopped. If for any reason this process is stopped, a connection should be dismantled (cut out), and a new one shall be made in a correct way.
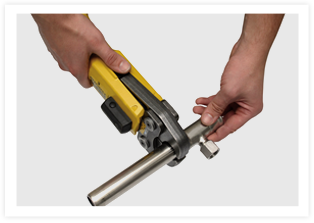
6.1. For clamping the three largest diameters (64; 76,1; 88,9; 108) use special jaws and a clamping tool by Klauke or Novopress. After you take out the jaws from their case, unlock them by pulling out a special pin and next open them out.
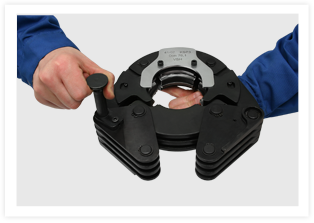
6.2. Put the opened out jaws onto a fitting. The jaws are provided with a special groove; fit the fitting collar into it. Caution: the plate bearing the jaws size should be always on the pipe side – see the Figures.
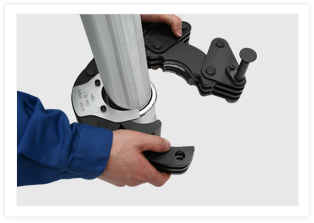
6.3. Having properly fitted the jaws on a fitting, secure them again, by pressing their pin fully inside. Then the jaws are ready to connect the clamping tool.
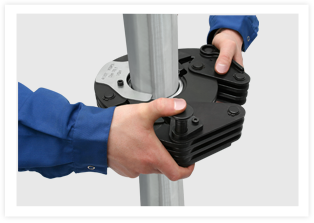
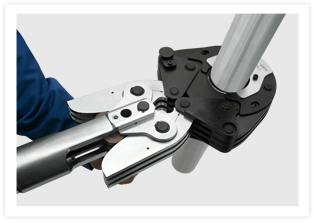
6.4. The clamper tool must be connected with the jaws as in the Fig. above. Absolutely take care that the clamping arms are inserted fully into a special seat in the jaws, what is marked on these arms. With the clamping tool so connected it can be started to work in order to make a fully clamped conenction.
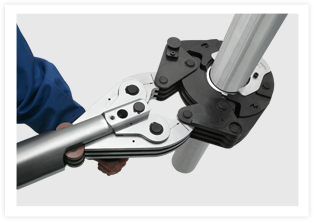
6.5. After starting the clamping tool the process of clamping is performed automatically and cannot be stopped. If for any reason this clamping is interrupted, a connection shall be dismantled (cut out) and made properly again. With the clamping step completed the clamping tool retracts automatically to its original position. Then, pull out the clamping tool arms from the jaws. To take the jaws off a fitting unlock them again by pulling out the pin and open then. Keep the jaws in their case, securely locked.
Copyright © 2017 KAN Group | All rights reserved. Privacy policy and important information concerning cookies.


